Quick start (5 minutes)
Create a project, drop in the script tag, and run your first tour end-to-end.
Set up TourKit with your AI agent
RECOMMENDEDSkip the manual setup. Copy this prompt and paste it into Cursor, Antigravity, Claude Code, or GitHub Copilot. Your agent will detect your framework, read the official docs, and install the SDK correctly — script tag, routing provider, everything.
1.Copy the prompt above
2.Paste it into your AI coding agent
3.Agent detects your stack, reads the docs, and installs the SDK correctly
4.Sign up, create a project, and add your script key
Or set up manually
Prerequisites
- A TourKit account (sign up from the marketing site).
- A site or dev environment where you can add a script tag.
1. Create a project
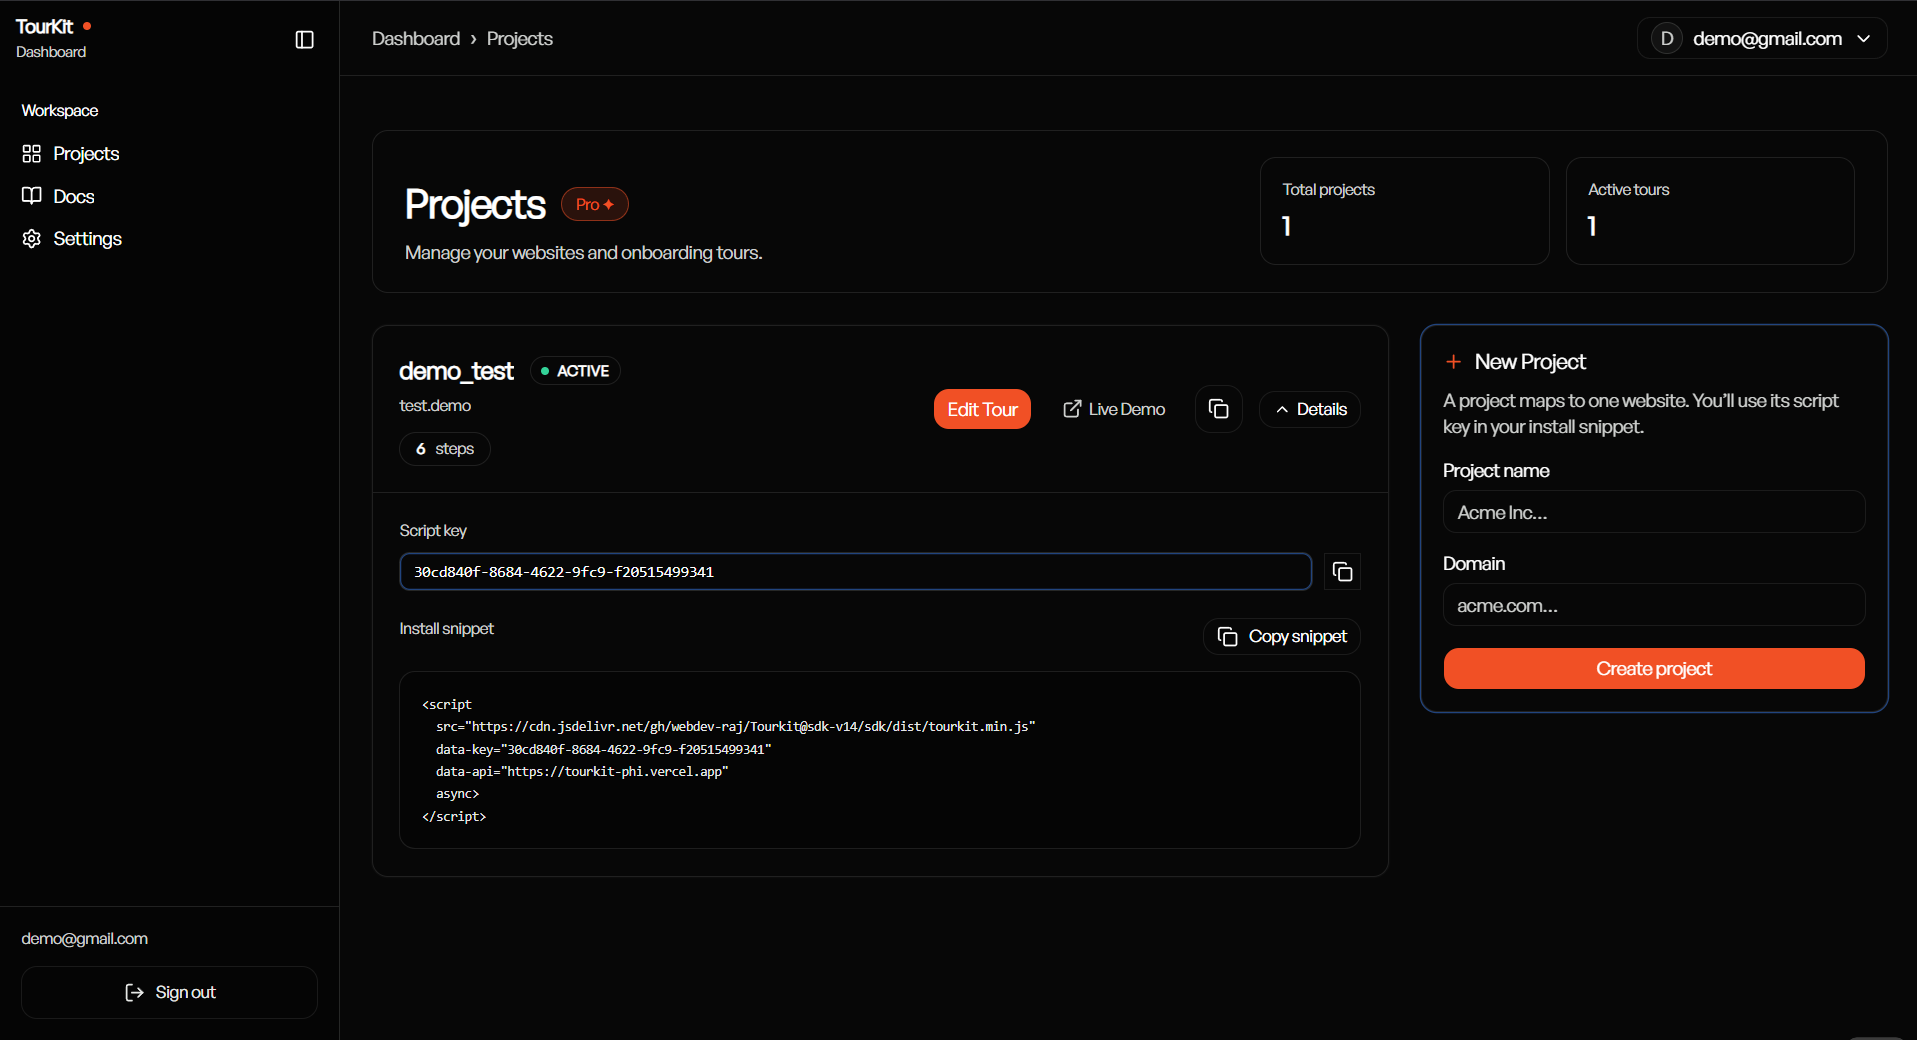
In the dashboard, create a project and note your unique script key.
2. Install the snippet
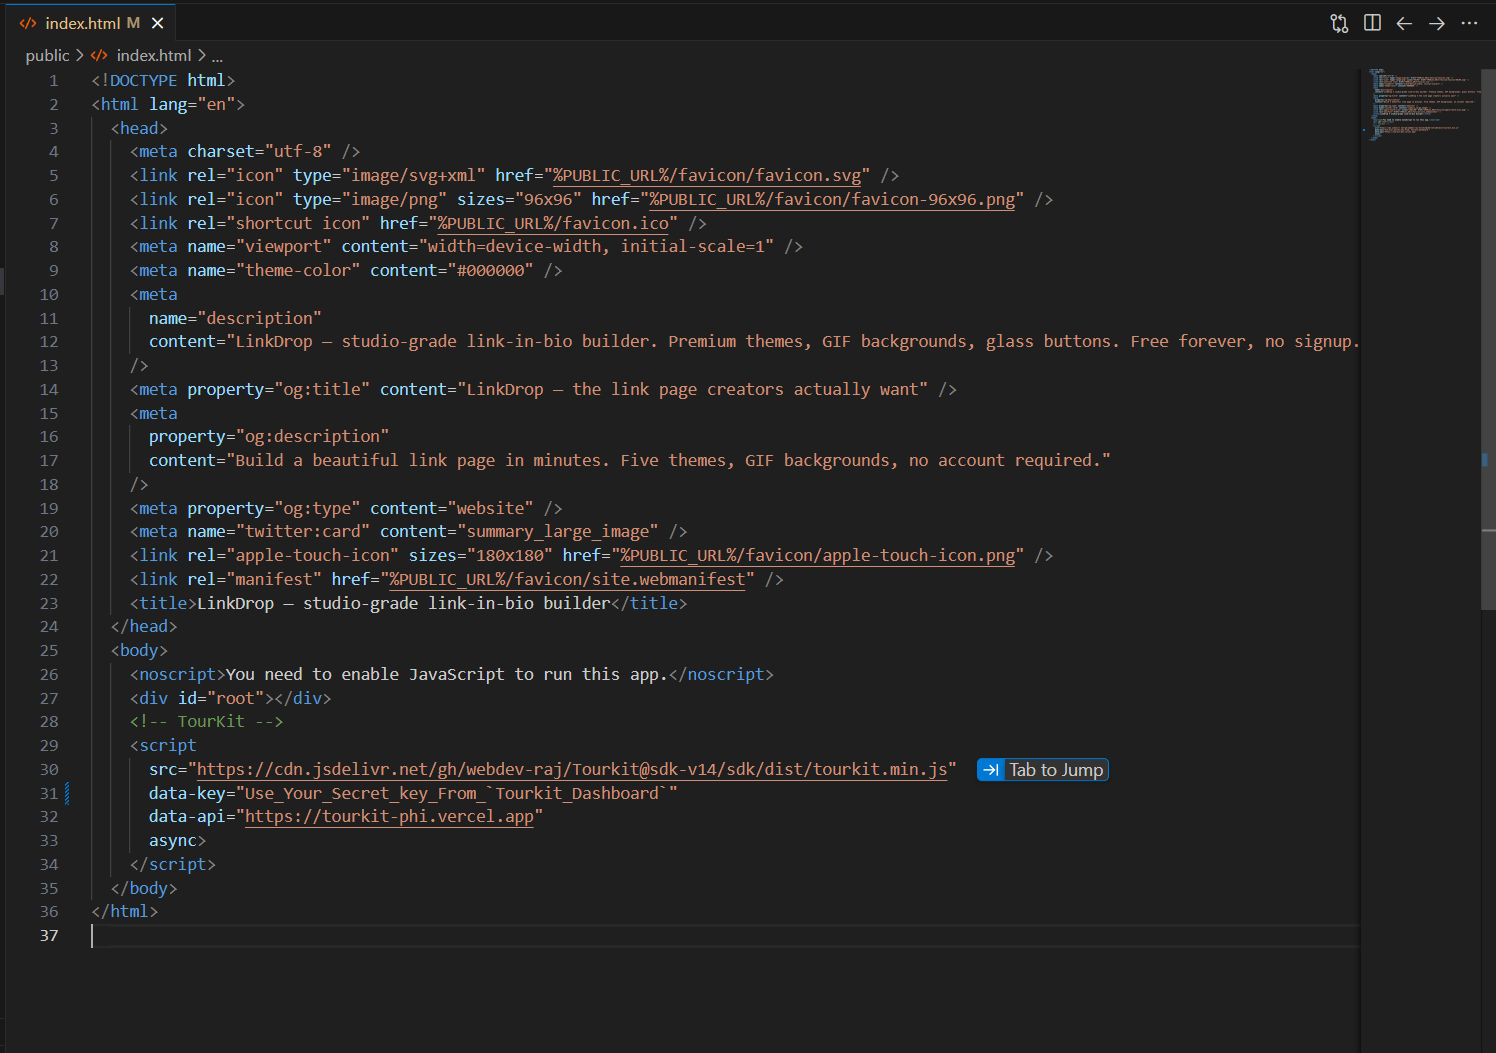
The TourKit SDK is hosted on jsDelivr CDN. Add this script tag before your closing </body> tag:
<script
  src="https://cdn.jsdelivr.net/gh/webdev-raj/Tourkit@sdk-v14/sdk/dist/tourkit.min.js"
  data-key="YOUR_SCRIPT_KEY"
  data-api="https://tourkit-phi.vercel.app"
  async>
</script>
Replace YOUR_SCRIPT_KEY with the script key from your TourKit dashboard project.
The data-api attribute tells the SDK where to fetch your tour configuration from.
3. Publish steps
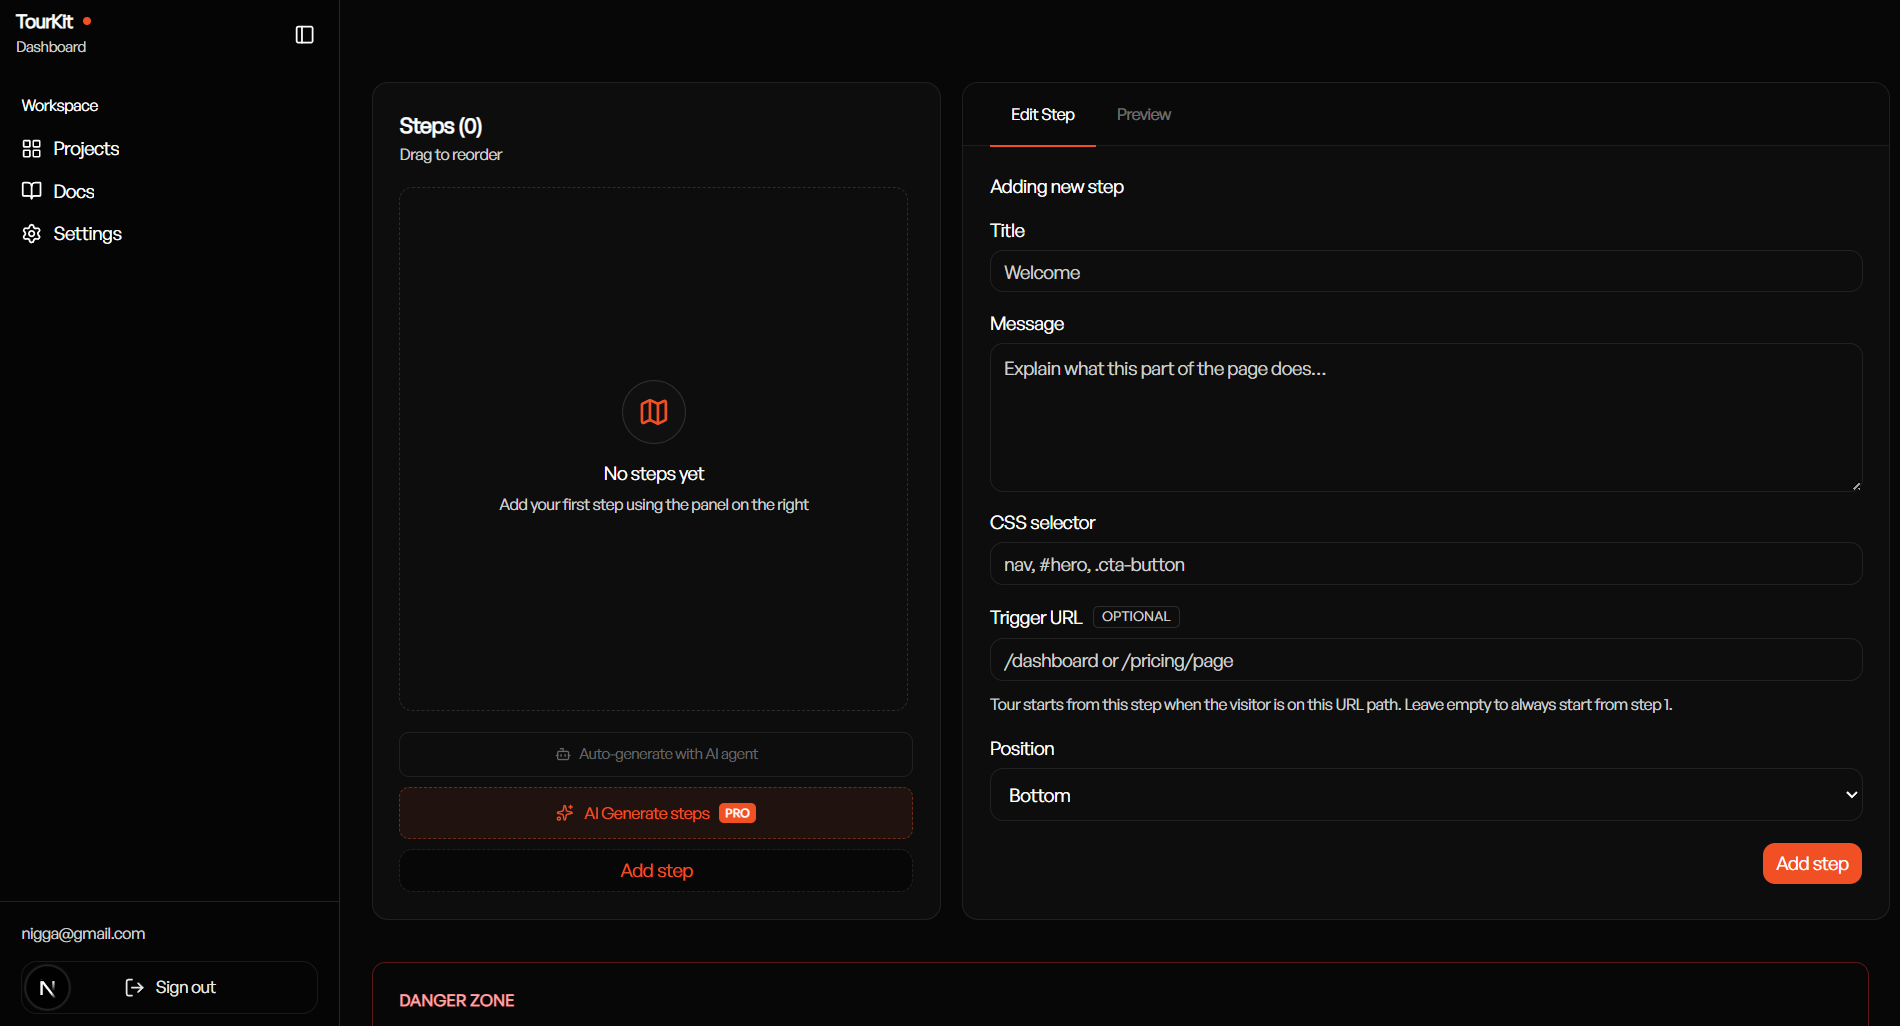
- Open the tour editor for your project.
- Add a step: CSS selector, title, message, position.
- Activate the tour when you are ready.
4. Verify on your site
Load the page that matches your selectors. The SDK fetches tour JSON and renders the tooltip tour.